Want to create professional-looking transitions in your travel videos but feel like a total beginner? There is this amazing tool called CapCut Desktop video editor that works like magic as it turns raw footage into perfect video edits.
The best part? It is easy to use and works well with any version of Windows and any type of PC, which is ideal for first-time editors.
Whether you’re working on personal projects or aiming to level up your content, CapCut video editor for pc has the features to help you shine. Now let’s get straight into the details as to how you can include stunning transitions quickly!
Getting Started with CapCut Desktop Video Editor

CapCut Transitions feature adds flow and visuals, helping you convey your story effectively. If you are recording vlog tutorials or a promotional video, CapCut's smooth transitions can make your video look more professional within minutes. Here's all you need to do:
Step 1: Download and Install
If you haven’t already, download CapCut Desktop from the official website. It’s free and compatible with most PCs.
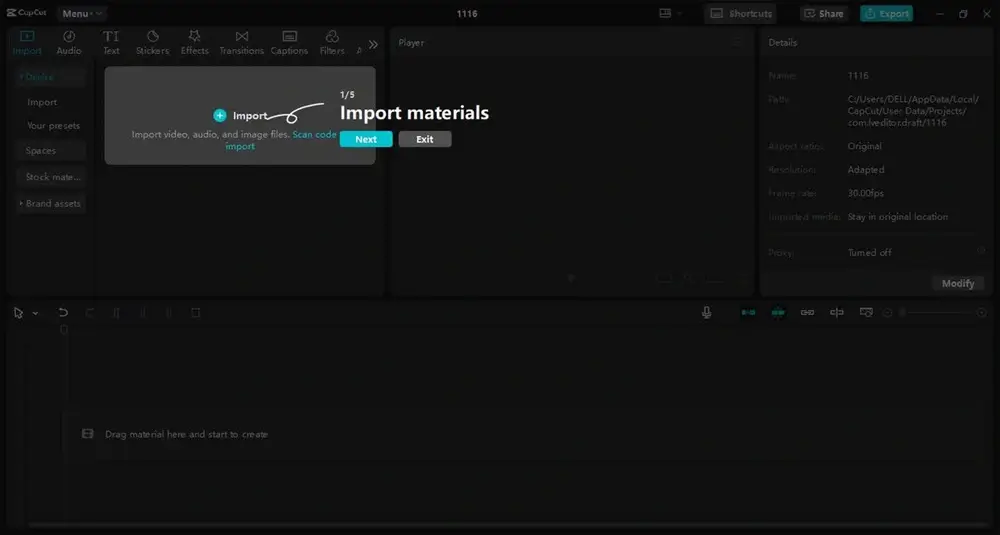
Step 2:Import Your Footage
You can open the CapCut application, then select the new project, and add your videos. You begin by arranging them on the timeline by dragging and dropping them.

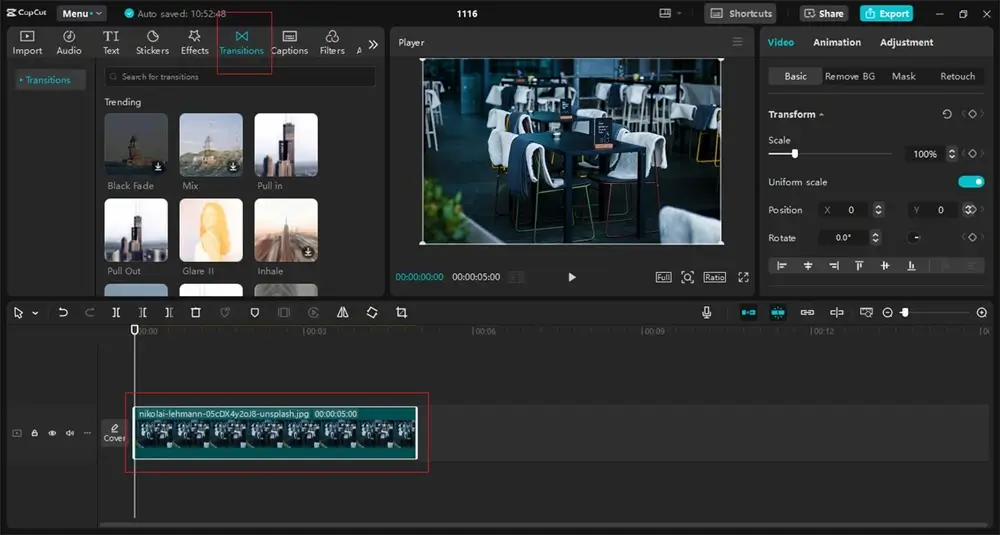
Step 3: Locate the Transition Library
On the timeline interface, there is a small button called “Transition” located between the clips. By clicking this, you can open a library of transition effects classified according to the style which can be basic, 3D or film.

For instance, when shooting a travel vlog, the Flip transition can come in handy to give a distinctly modern feel when swapping between beautiful sceneries. These categorized options ensure you can find the perfect style for your project with ease.

Step 4:Choose Your Transition
When you enter the library, play around with the different styles of transition effects in CapCut. It offers basic transitions like Fade, Zoom, and Wipe, as well as exciting effects like Spin Blur and Glitch Distortion.
Fade to Black: This is a great transition for ending a scene, setting up an emotion, or getting right into a message or a scene cut if the story is emotional.

Spin Blur: An ideal option to select in fast-paced action clips, such as switching between high-energy sports footage.

Bonus Features to Enhance Transitions
Caption Generator
The Caption Generator in CapCut can synchronize text overlays with transitions during your editing process. Like, when explaining a concept in a tutorial, you can use the Slide Left transition accompanied by the automatically generated captions to make the video more informative and interesting.

Text-to-Speech AI
CapCut desktop video editor now supports Text to Speech AI, where you can type the text and convert it into a professional voice-over. This feature is very effective in situations where it is possible to use a voice-over to explain transitions.
In an instructional video, you can use the Zoom Out transition when the next topic of the video begins with a new section using the Text-to-Speech AI option.

Step 5: Preview and Apply
Another unique feature of CapCut is that it allows you to preview the transitions before applying them to your video. Transition effects are easy to preview; all one has to do is merely place the cursor over a chosen transition and see the result on the spot. When it is done, drag the transition over the two clips you have on the timeline.
You can also extend or shorten the duration of the transition by dragging the edges of the effect icon. This allows you to adjust how fast or slow the transition period or process is.

Pro Tips for Stunning Transitions
Combine Effects: Pair transitions with overlays or filters for creativity or style. For example, you can add Lens Flare Overlaid with the Zoom Out transition for a cinematic feel.
Sync with Music: You should synchronize your shifts with the beat of background music. The audio waveform of CapCut allows easy-to-sync effects for maximum impact.
Mix Styles: It may be necessary in some cases to use more than one transition in the specific video. For instance, you can use a Wipe for a gradual transition and apply a Glitch Distortion when needed for an abrupt scene transition.
Conclusion
Applying beautiful transitions using the CapCut desktop video editor is not a complicated process even when you are new to the editing process.
The interface is easy to navigate, and there are many options for the transition and other useful features such as Caption Generator and Text-to-Speech AI.
These tools are useful if you are making vlogs, tutorials, promotional videos, and much more. Therefore, download CapCut today, and let’s start creating content that captivates your audience!


Disclaimer:
This post may contain affiliate links. I receive a small commission at no cost to you when you make a purchase using my link.


